How to Airdrop a Token
- 29 Mar 2023
- 3 Minutes to read
- DarkLight
How to Airdrop a Token
- Updated on 29 Mar 2023
- 3 Minutes to read
- DarkLight
Article Summary
Share feedback
Thanks for sharing your feedback!
In this tutorial we will show you how to distribute tokens for free to users from your admin dashboard. This free distribution of tokens (in our case, NFTs) is often referred to as an "airdrop".
This is a useful tool for minting an NFT to any email address, whether they are registered on Curios or not.
Navigate to the Air Drops page
From your admin dashboard, select AIR DROPS in the side navigation menu.

Create a new air drop
In the top right of the page, select Start New Air Drop.

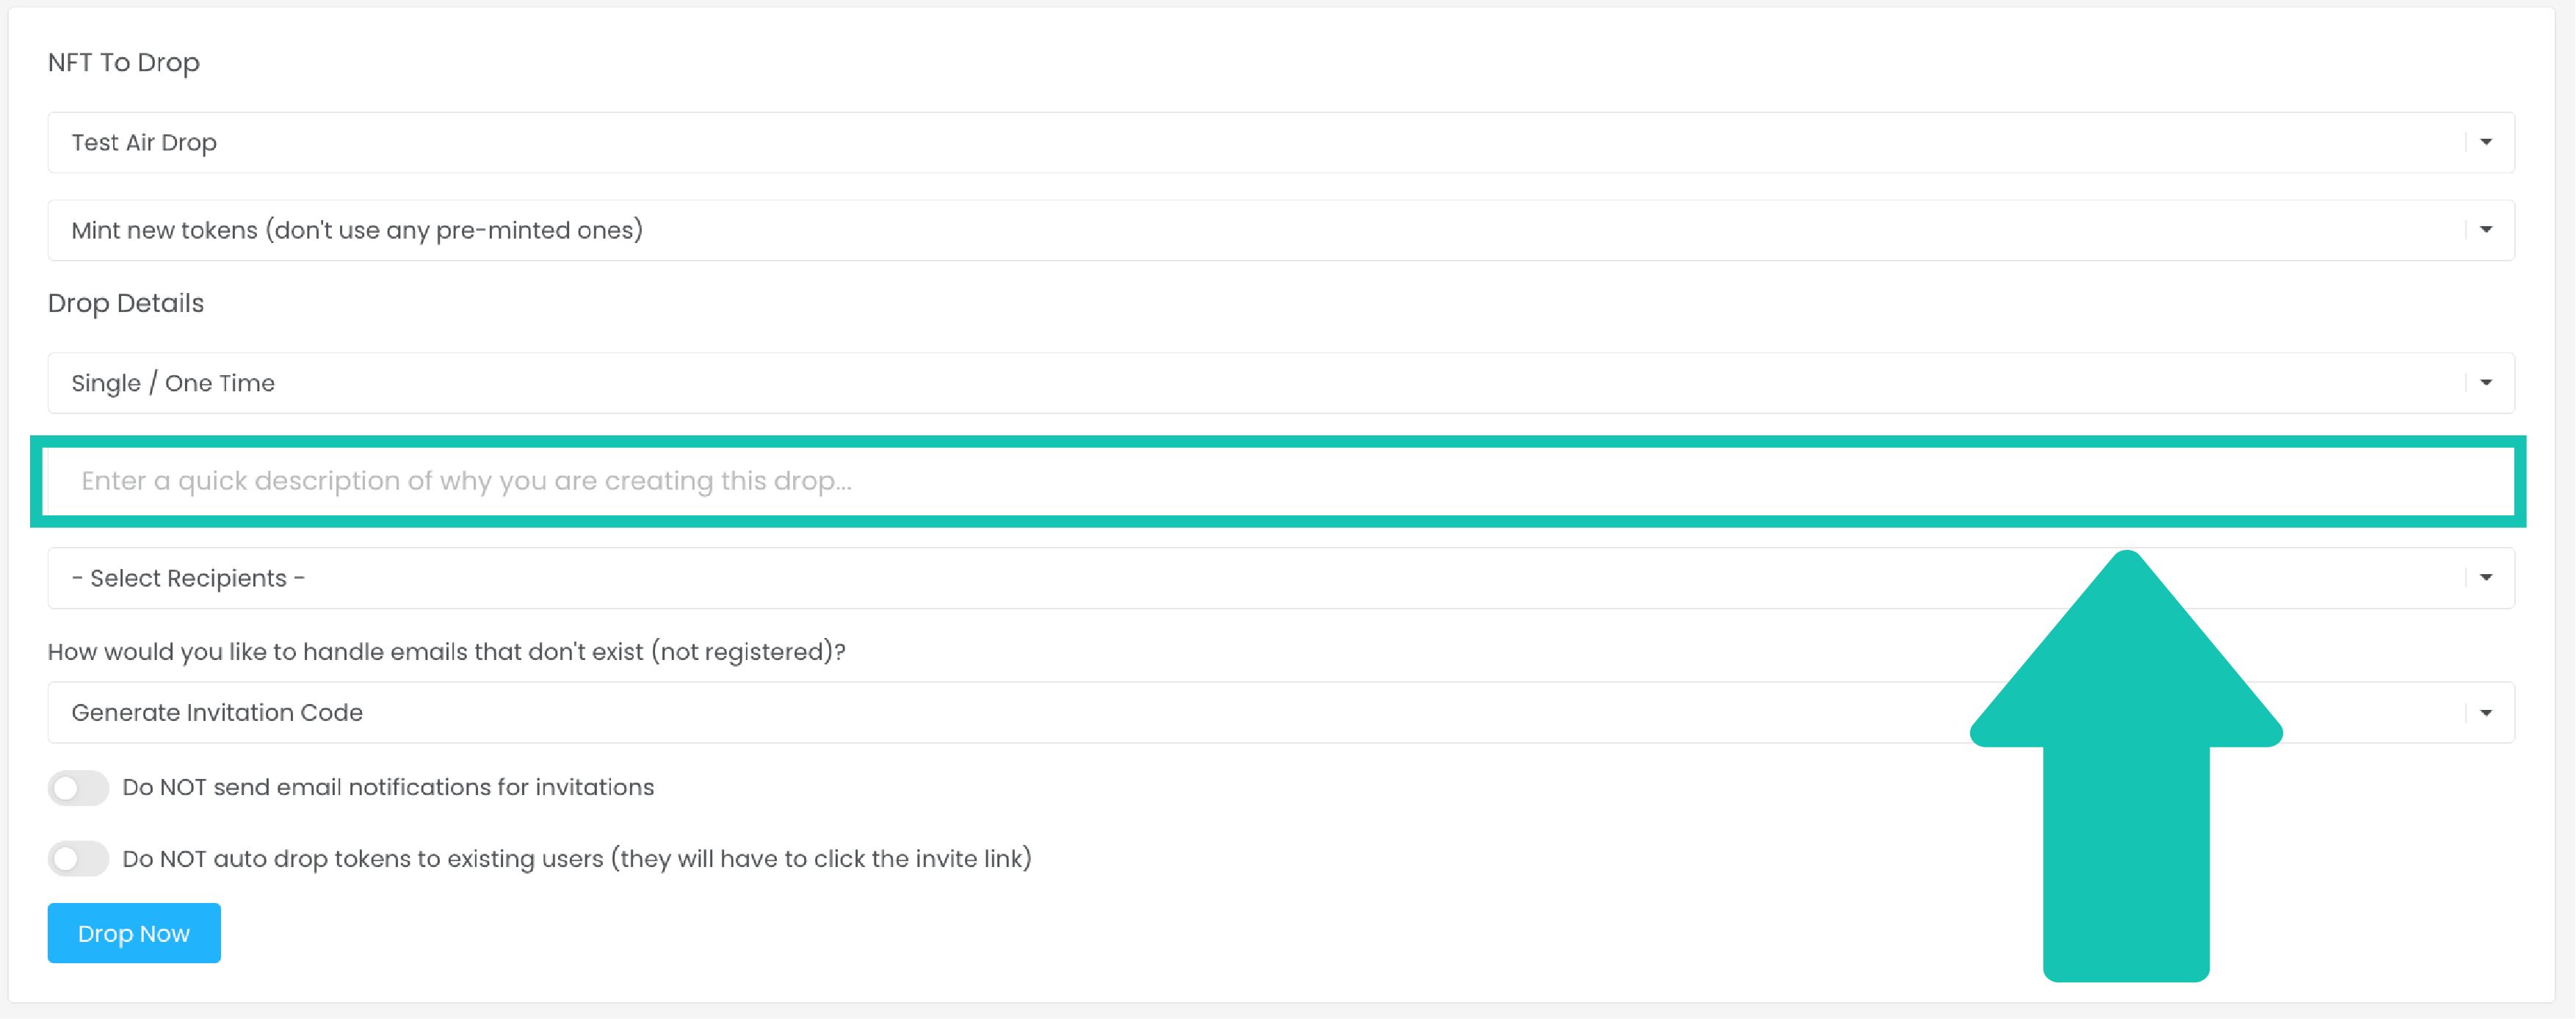
To proceed, you will need to complete the information requested in the form.

- Using the SELECT COLLECTION dropdown menu, select which NFT collection you would like to issue the airdrop from. The list of options will include all collections saved in your Curios account.

Note: The next two dropdown menus will default to the only option available. These options cannot be changed.

- Next, type in a description for the Airdrop. The description will not be visibile to the public, but serves as an internal reference for you and your team to note why the Airdrop was performed.

- Airdrops are issued via email, so you will need to provide the email address(es) for your Airdrop recipients. Click the dropdown and select UPLOAD EMAIL LIST to proceed.
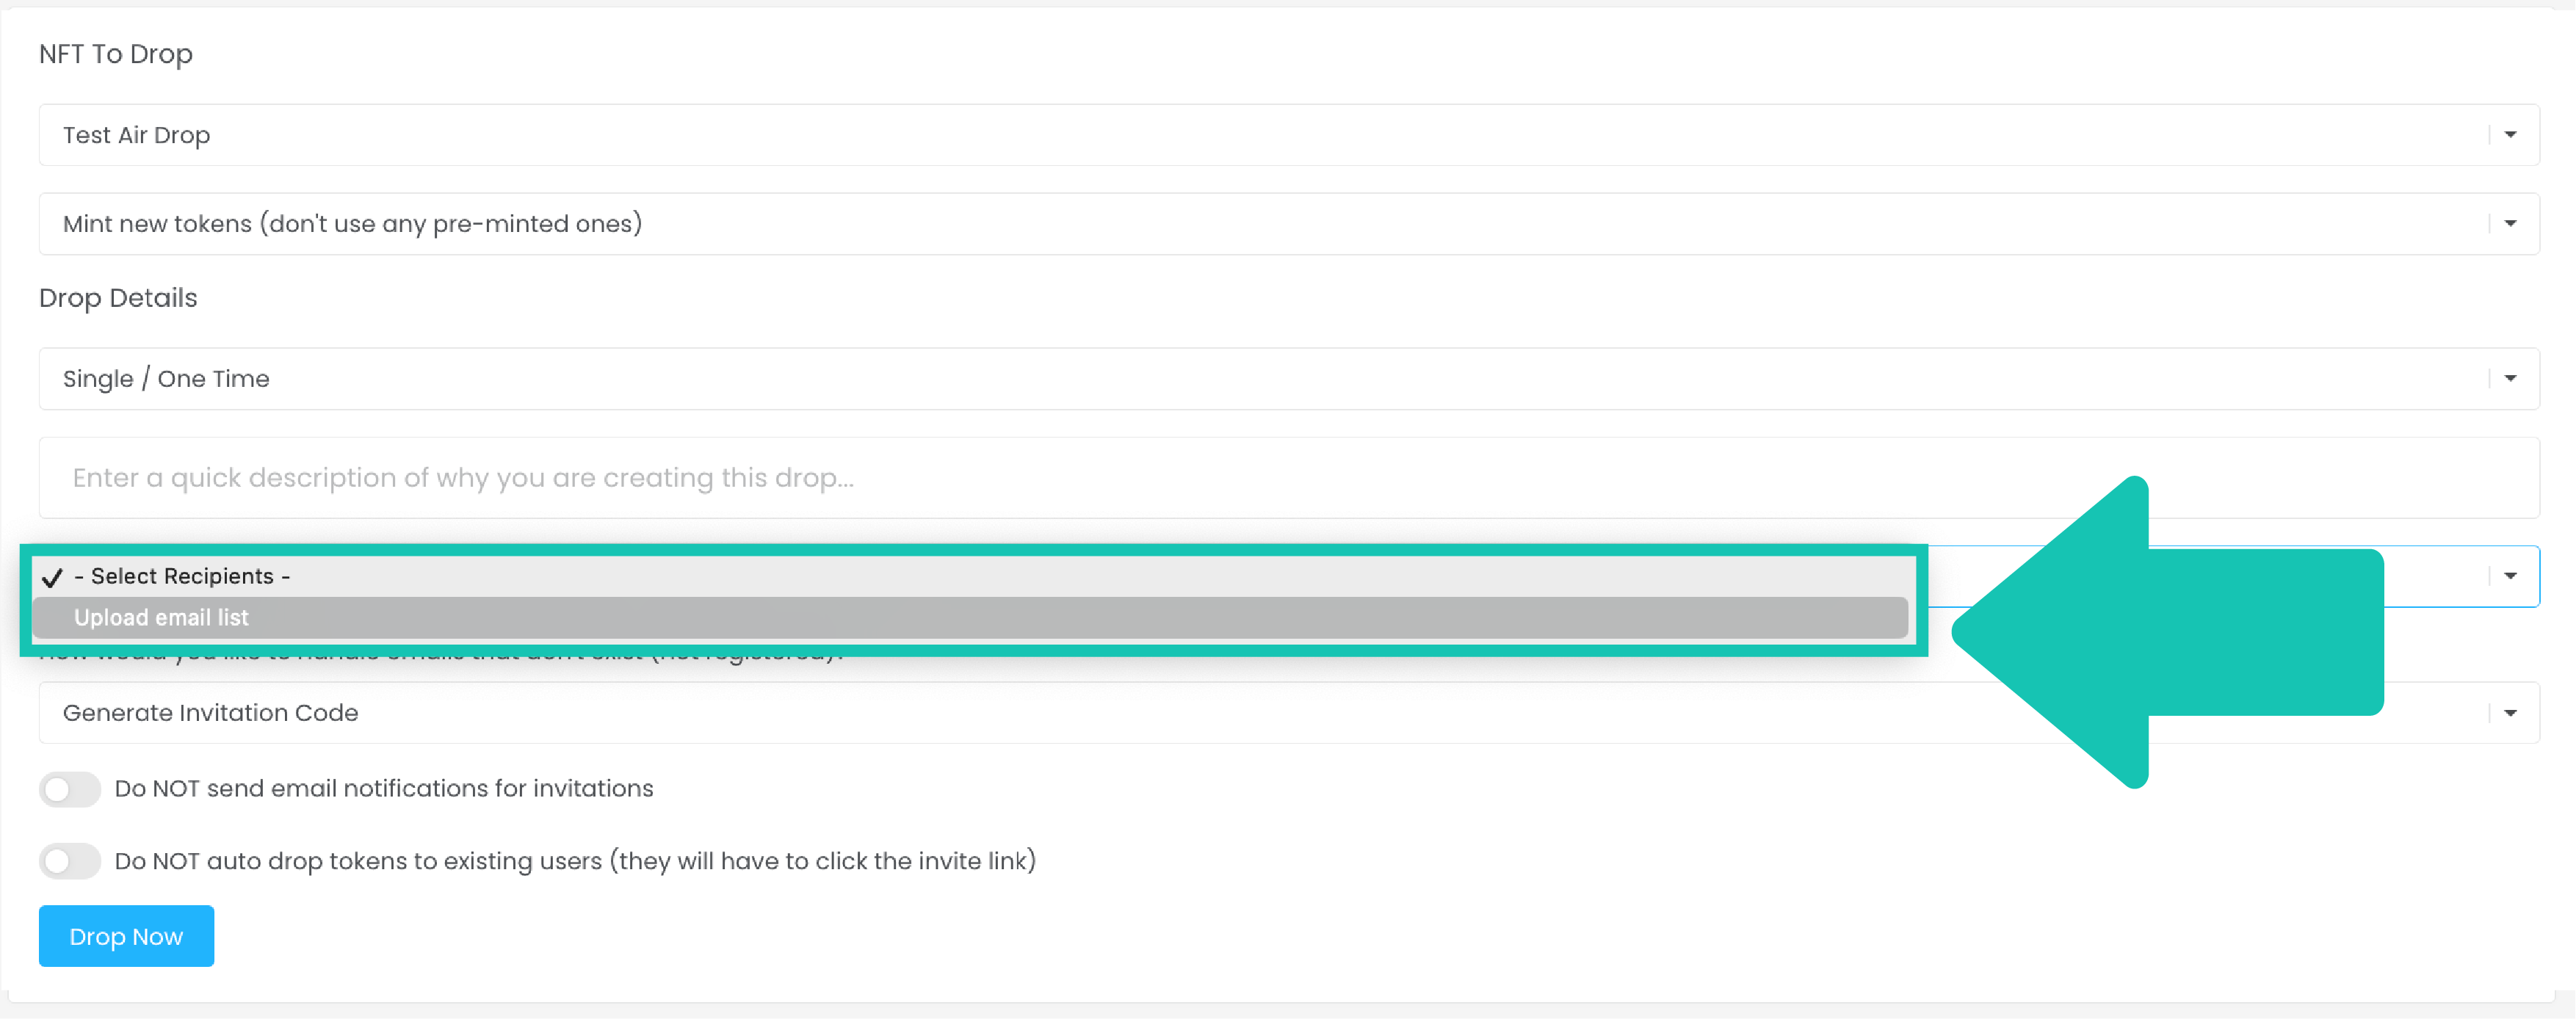

- In the open text box, you may either type recipient emails or paste them from an external source. For multiple recipients, email address should be separated using a space, comma, or a semicolon.

Note: Airdrop recipients must have a Curios account to receive their token. If a recipient already has a Curios account, the Airdrop process will send the NFT directly to the Curios account corresponding to the recipient's email address. If a recipient is not registered on Curios, they will recieve a link to their email address prompting them to register on Curios to receive the Airdrop you have sent. Upon registration, the user will be routed to their wallet where they may access the token.
- Prior to completing your Airdrop, you can adjust the distribution settings. There are two toggles at the bottom of the Airdrop form allowing you to set distribution preferences.

Preference 1: Automatic Email Notification: The first option allows you to control the email notification sent regarding your Airdrop. By switching the toggle to the right, you will deactivate the automatic email from Curios informing the recipient that the Airdrop has occured. Instead, you will receive a URL which you may include in a personalized email to the recipient alerting them of the Airdrop.
Preference 2: Automatic Airdrop to Curios Account Holders: By switching the second toggle to the right, you will deactivate automatic drops to Curios account holders. Instead, the receipient will have to click on a link provided via automatic email from Curios or a link which you provide in a direct personalized email.
- Once you are ready to complete your Airdrop, click the blue DROP NOW button.

Before your Airdrop is completed, you will receive a prompt confirming that you are aware of the fees associated with the transmission of your Airdrop. While an Airdrop provides your recipients with a free token, there is still a fee per email to complete the distribution of tokens. To acknowledge the fee and proceed, click the OK button.

After submitting your drop, you will be redirected to a new page which displays the status of the Airdrop. Here you can track if a customer sucessfully retrieved the drop.

If you would like to share this Airdrop with additional recipients, you may do so from this screen. Keep in mind this is only to make additional distributions of the existing Airdrop, not to create a new Airdrop. To create a new Airdrop, you will need to repeat the steps listed above. To add additional recipients, click the blue Add Recipients button.

Fill in your recipient details, adjust the toggles to meet your distribution preferences, and click Drop Now to complete the additional drops.

To accss the status page for your Airdrop at any time, click the View Results button on your Airdrops dashboard.
